Luna ModelerDatabase Design Tool for Supabase
- Native Supabase Connection A dedicated connection type, new in version 14.5
- Reverse Engineering Turn your Supabase schema into an ER diagram
- Real PostgreSQL Support Enums, domains, views, functions and triggers
- One Price. No Subscriptions Buy once. Use on Windows, macOS, or Linux.
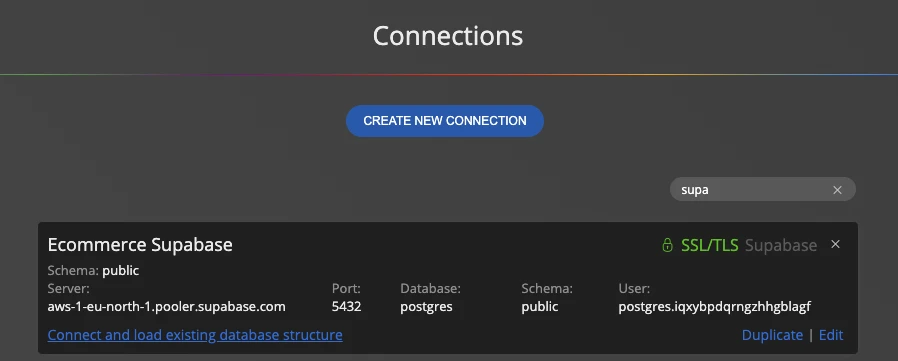
Create a Supabase connection in Luna Modeler, paste the host, port, database and user from the Connect dialog of your Supabase project, enable SSL/TLS and click Connect and load existing database structure. Luna Modeler reads the schema and draws the ER diagram for you.
Learn more about Luna Modeler
No. Luna Modeler connects over the standard Postgres protocol with the same credentials any other database client uses. Nothing is installed in your project and your data model stays on your computer.
and Visualize Your Database
Step 1: Open the Connect Dialog in Supabase
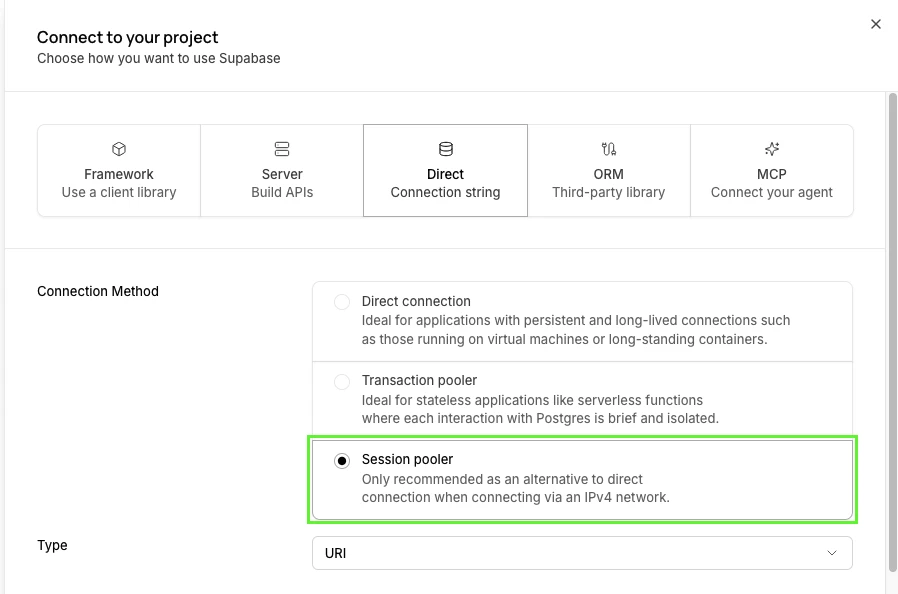
Open your project in the Supabase dashboard and click Connect. Select Direct (connection string) and choose the connection method.
If your network uses IPv4, pick Session pooler — Supabase proxies session pooler connections over IPv4 for free. On an IPv6 network, the direct connection works as well.
Step 2: Copy the Connection Parameters
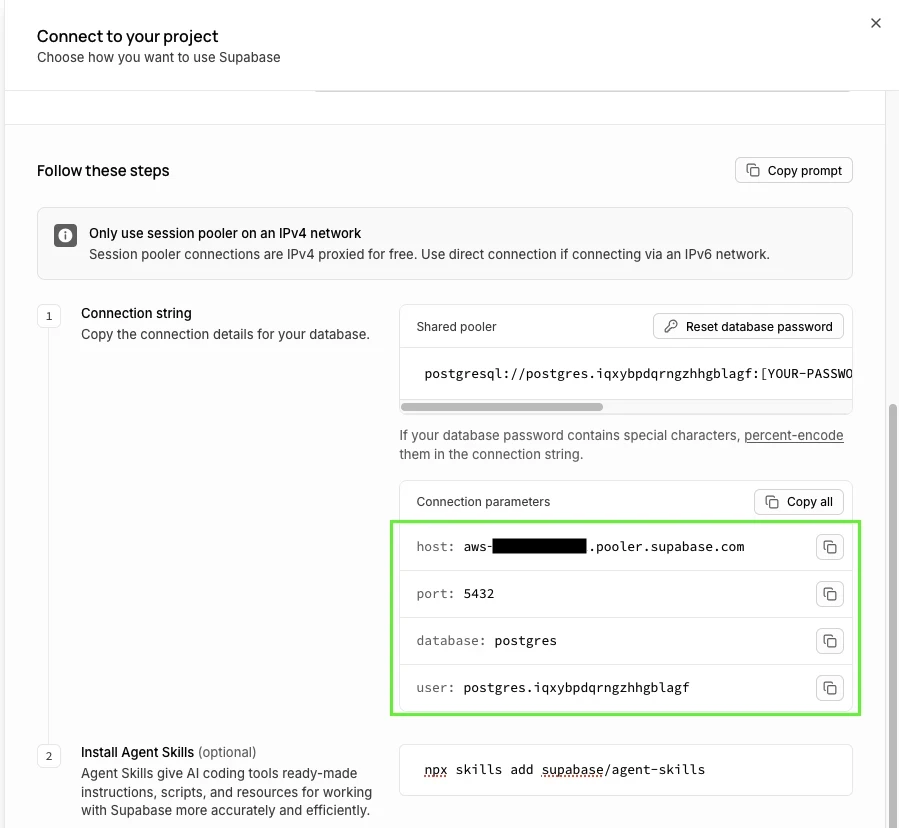
Scroll down to Connection parameters. You need four values: host, port, database and user. With the session pooler, the user has the form postgres.<project-ref>.
The password is the database password you set when you created the project. If you don't remember it, use Reset database password in the same dialog.
Step 3: Create a Supabase Connection in Luna Modeler
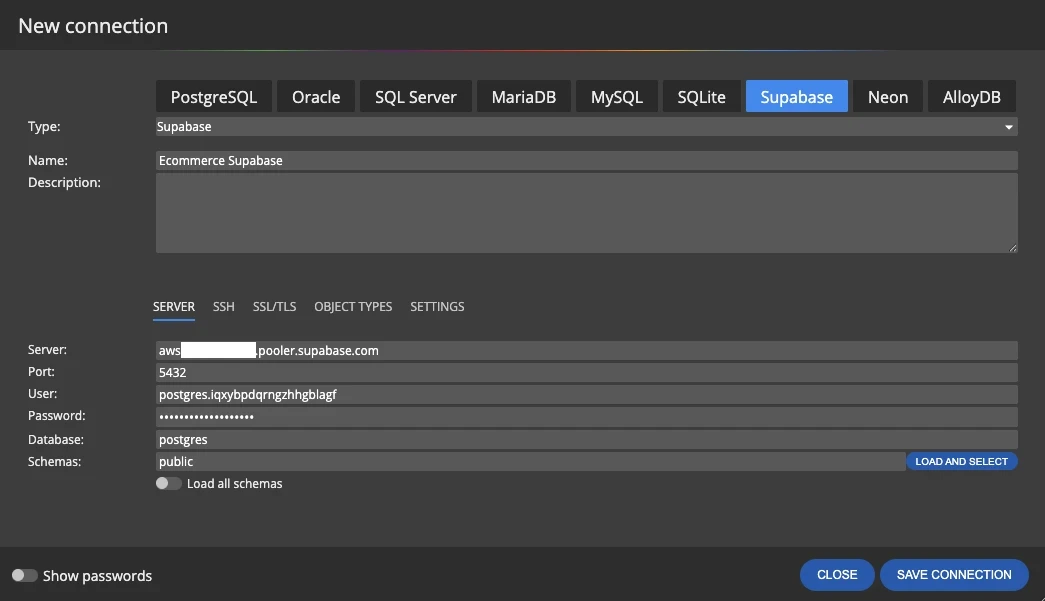
Click Connections on the main toolbar, then Create new connection and select the Supabase tab. Fill in the Server, Port, User, Password and Database fields with the values from Supabase.
Your application tables usually live in the public schema. Click Load and select to pick other schemas, or turn on Load all schemas.
Step 4: Enable SSL/TLS
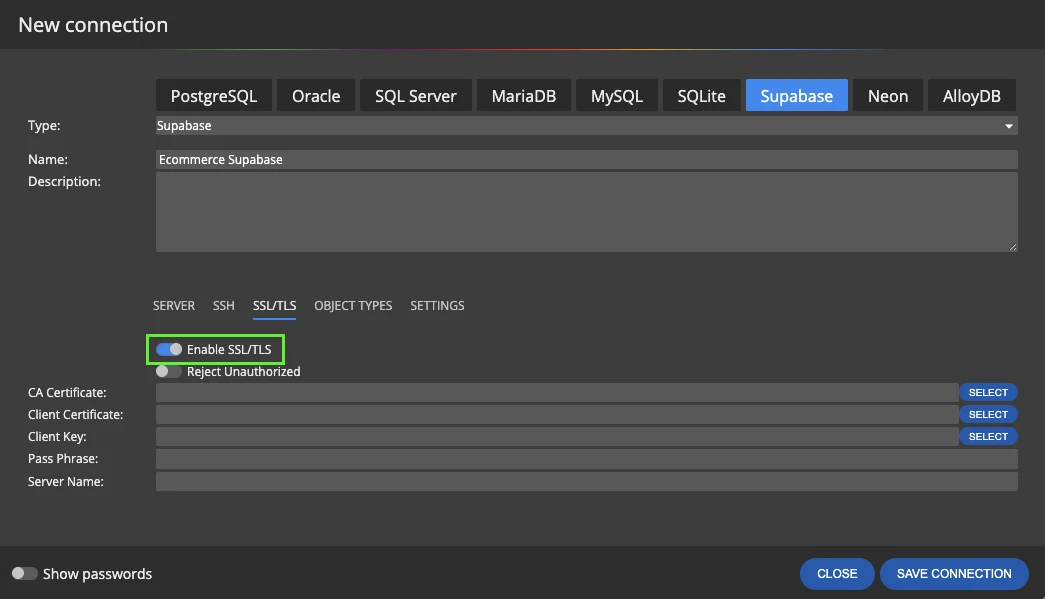
Switch to the SSL/TLS tab and turn on Enable SSL/TLS. Encrypted connections protect your credentials and data in transit, and Supabase projects can be set to accept SSL connections only.
To verify the server certificate, download the SSL certificate from the database settings of your Supabase project, select it as the CA Certificate and turn on Reject Unauthorized. Then save the connection.
SSH/SSL/TLS connections are supported in the Professional Edition.
Step 5: Connect and Load the Database Structure
Click Connect and load existing database structure. Luna Modeler reads the tables, views, enums, functions, triggers and other objects and creates a new project with an ER diagram.
Working with a large database? Use the Object types tab of the connection to choose which object types are reverse engineered, and leave the rest out.
Working with Supabase Locally in Docker
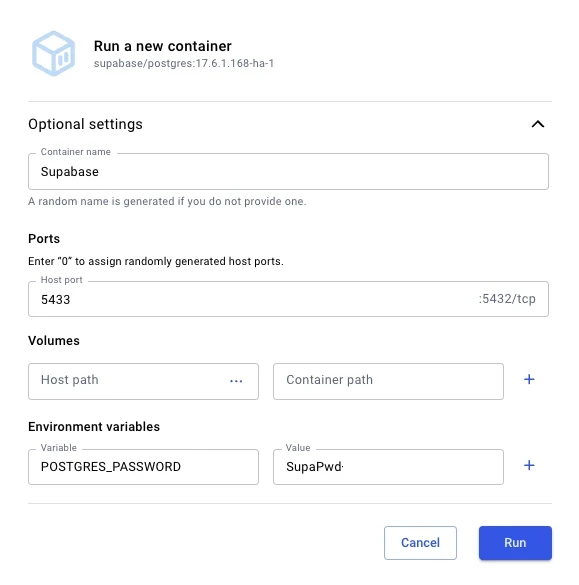
Prefer to design against a local copy first? Run the supabase/postgres image in Docker, map a free host port (for example 5433 to the container's 5432) and set the POSTGRES_PASSWORD environment variable.
Then create a Supabase connection in Luna Modeler with localhost as the server, the mapped port and the postgres user. Design and test locally, then generate the SQL script and run it in your cloud project.
Design a New Supabase Database from Scratch
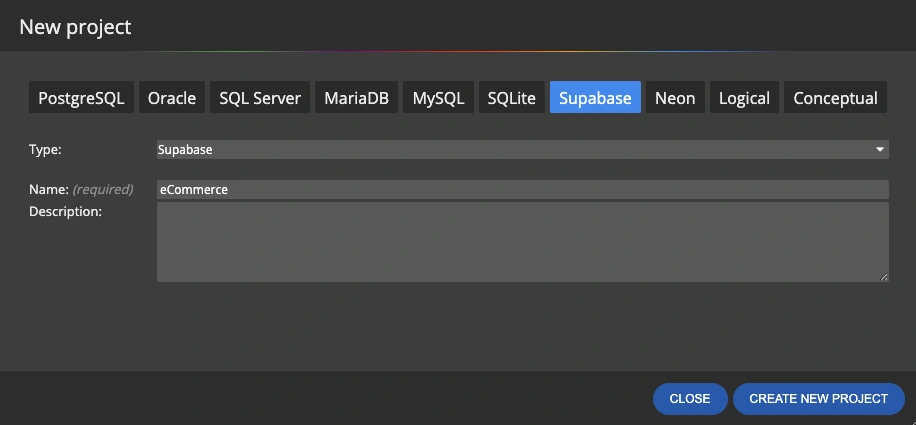
No database yet? Click New on the main toolbar, select Supabase in the New project dialog and start drawing tables, relationships, enums and views. When the design is ready, generate the SQL script and run it in your Supabase project.
Moving an existing model to Supabase? Open it and use Convert project with Supabase as the target platform. Model conversion is available in the Professional Edition.
Document, Generate SQL and Keep the Model in Sync
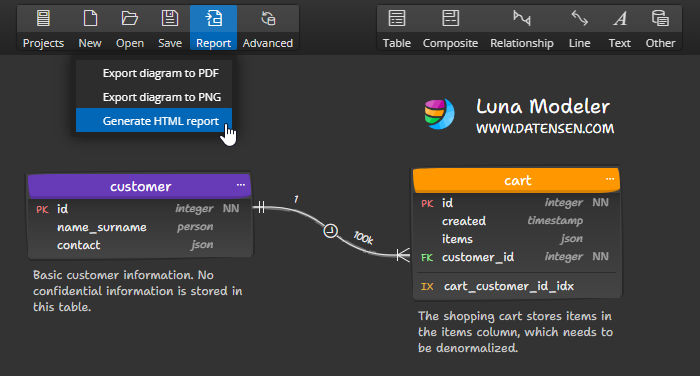
Once the project is loaded, enrich the diagram with notes, sub-diagrams and descriptions, and share it as an interactive HTML report or PDF. Design new tables visually and generate SQL scripts you can run in the Supabase SQL editor.
When the database changes, compare it with your model to catch schema drift, update the project or generate synchronization scripts.
Use the session pooler if your network uses IPv4. Supabase proxies session pooler connections over IPv4 for free. On an IPv6 network, the direct connection works as well.
Use it. Encrypted connections protect your credentials and data in transit, and Supabase projects can be set to accept SSL connections only. Turn on Enable SSL/TLS on the SSL/TLS tab of the connection.
Yes. Keep public for your application tables, or click Load and select to add schemas such as auth or storage when you need them. You can also load all schemas at once.
Yes. Design tables visually and generate a PostgreSQL SQL script with one click. Run it in the Supabase SQL editor or with any Postgres client.
Connections to Supabase in the cloud use SSL/TLS, which is supported in the Professional Edition. The 14-day trial lets you try all professional features, including SSL/TLS.