Luna ModelerDatabase Design Tool for Neon
- Native Neon Connection A dedicated connection type, new in version 14.5
- Any Neon Branch Save one connection per branch and visualize each of them
- Real PostgreSQL Support Enums, domains, views, functions and triggers
- One Price. No Subscriptions Buy once. Use on Windows, macOS, or Linux.
Create a Neon connection in Luna Modeler, fill in the host, role and database from the connection string of your Neon project, keep SSL/TLS enabled and click Connect and load existing database structure. Luna Modeler reads the schema and draws the ER diagram for you.
Learn more about Luna Modeler
Developers building on serverless Postgres who want to see their schema, not just query it. Teams that use Neon branches for development and preview environments. Consultants who need to document a Neon database for a client.
and Visualize Your Database
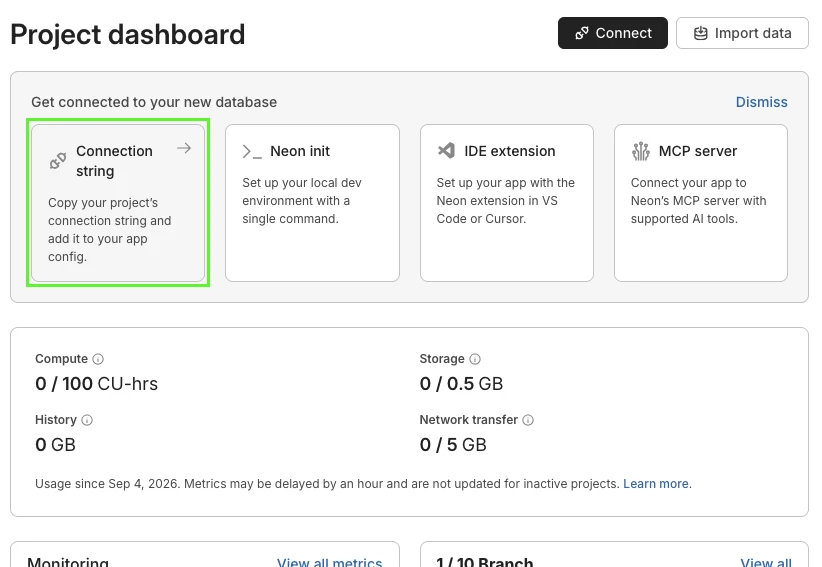
Step 1: Open the Connection Details in Neon
Open your project in the Neon console. On the Project dashboard, click the Connection string card (or the Connect button in the top right corner).
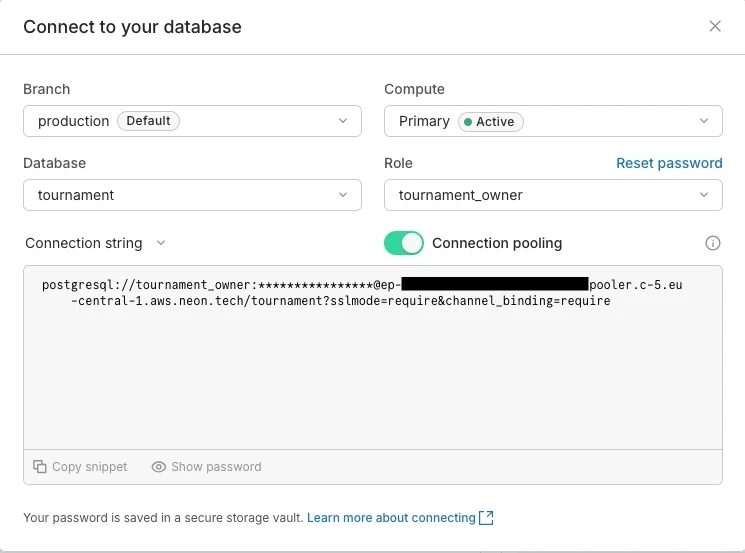
Step 2: Choose the Branch, Database and Role
In the Connect to your database dialog, select the Branch, Compute, Database and Role you want to use. Neon then shows a connection string in this form:
postgresql://<role>:<password>@<host>/<database>?sslmode=require
With Connection pooling turned on, the host contains -pooler. Keep this dialog open — you'll copy the host, role, password and database into Luna Modeler in the next step.
Step 3: Create a Neon Connection in Luna Modeler
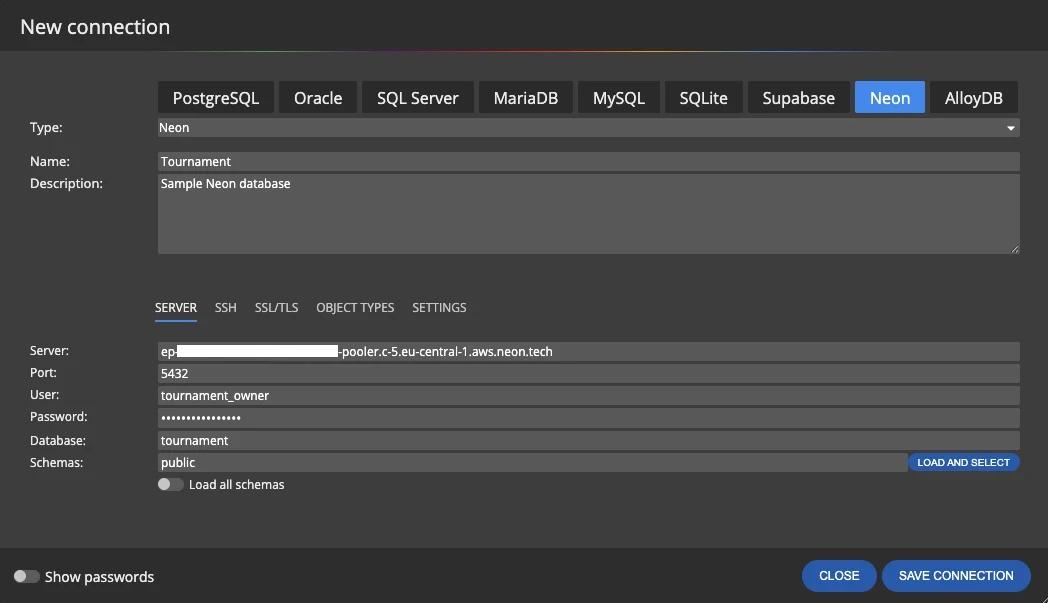
Click Connections on the main toolbar, then Create new connection and select the Neon tab. Copy the parts of the connection string into the fields:
- Server — the host after
@, for exampleep-…-pooler.eu-central-1.aws.neon.tech - Port —
5432 - User and Password — the role and its password
- Database — the name after the host
- Schemas —
public, or click Load and select
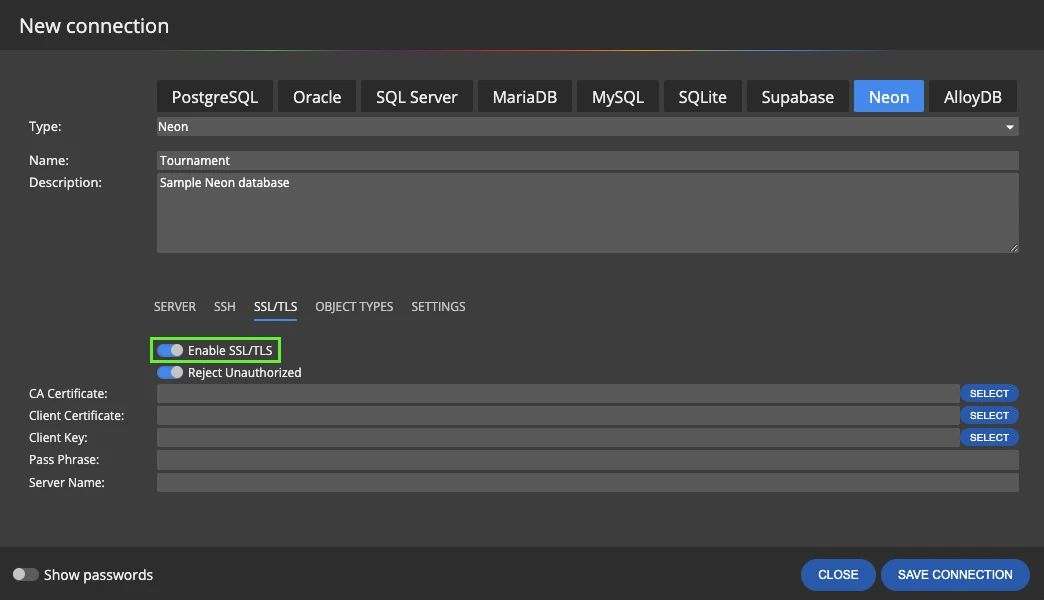
Step 4: Keep SSL/TLS Enabled
Neon accepts encrypted connections only. On the SSL/TLS tab, turn on Enable SSL/TLS. Neon uses publicly trusted certificates, so you can keep Reject Unauthorized on without selecting a CA certificate file.
Save the connection and click Connect and load existing database structure. Luna Modeler reads the tables, views, enums, functions, triggers and other objects and creates a project with an ER diagram.
SSH/SSL/TLS connections are supported in the Professional Edition.
Neon Branches: One Connection per Branch
Every Neon branch has its own compute endpoint and host name. Save a separate connection for each branch you care about — production, staging, a short-lived feature branch — and use Duplicate in the connection list to create the next one in seconds.
Reverse engineer a feature branch to review what it changes, or compare your model with the production branch to catch schema drift before a release.
Design a New Neon Database from Scratch
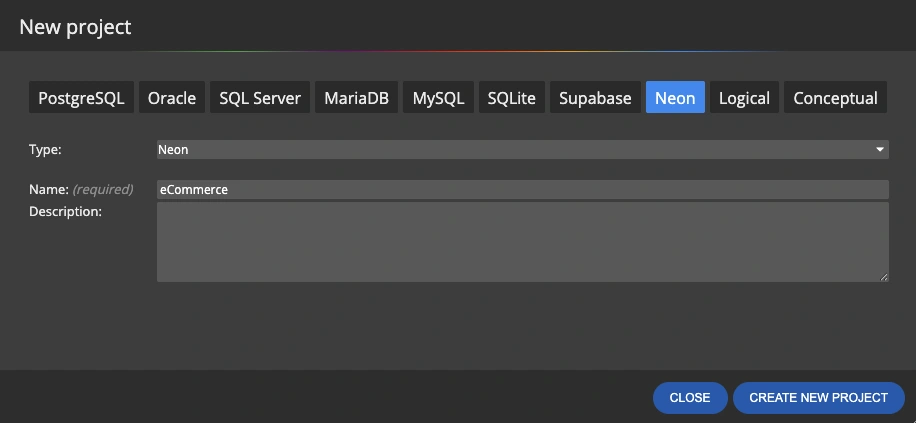
Starting a new project on Neon? Click New on the main toolbar, select Neon in the New project dialog and design tables, relationships, enums and views visually. Generate the SQL script and run it on a development branch first.
Moving an existing model to Neon? Open it and use Convert project with Neon as the target platform. Model conversion is available in the Professional Edition.
Document the Schema and Generate SQL
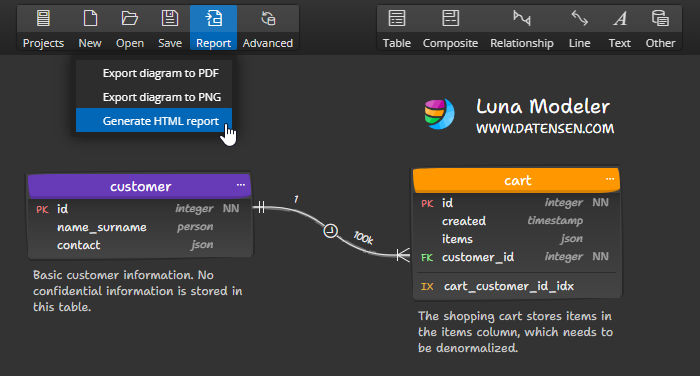
Once the project is loaded, enrich the diagram with notes, sub-diagrams and descriptions, and share it as an interactive HTML report or PDF. Design new tables visually and generate SQL scripts you can run in the Neon SQL Editor or with any Postgres client.
For loading the schema, both work. The pooled host contains -pooler in its name. For running SQL scripts that change the schema, a direct connection is the usual choice.
Neon starts a suspended compute when a client connects, so the first connection from Luna Modeler can take a few seconds longer. After that, it works as usual.
Yes. Every branch has its own host, so save one connection per branch. Reverse engineer any of them, or compare your model with a branch to find differences.
Neon accepts SSL/TLS connections only, and SSL/TLS is supported in the Professional Edition. The 14-day trial lets you try all professional features, including SSL/TLS.
No. Luna Modeler is a desktop application for Windows, macOS and Linux. Database connections and data models stay on your computer.