The creation of Subject area objects/graphics is supported in all our data modeling tools, however the following text describes how to work with subject areas in Luna Modeler.
What is a subject area used for?
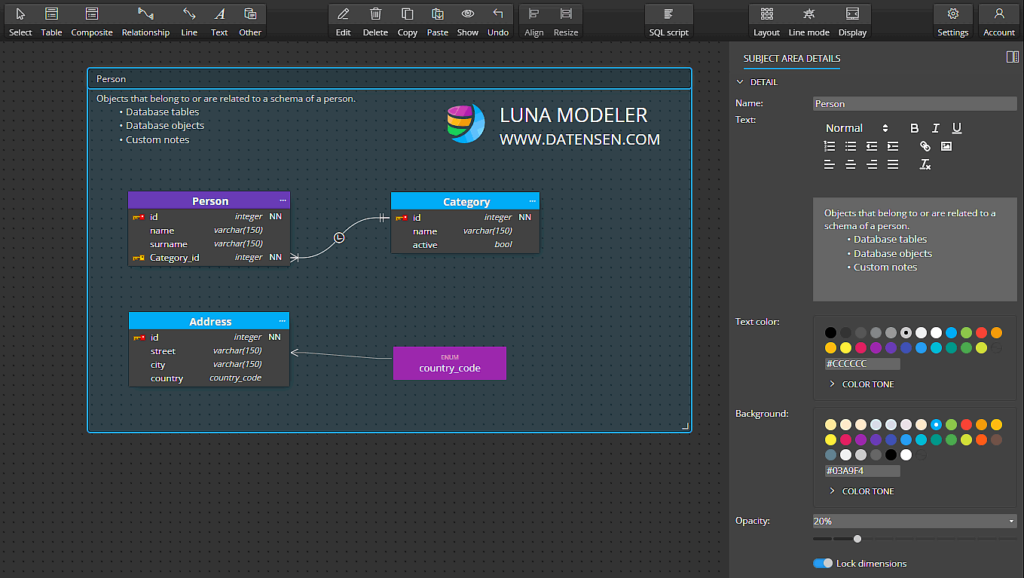
It is a graphic element on which you can place tables, notes and other database elements like functions or procedures that are logically related. In short, using subject areas you can create visualizations for groups of objects that belong together.

How to create subject areas?
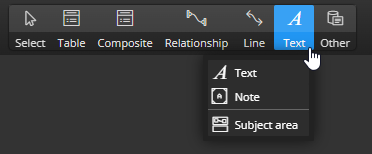
Click on the Text button in the main toolbar and select Subject area. Then click in the diagram or draw a rectangle by moving your mouse with the left button pressed. The new subject area will either be placed at the position where you clicked in the diagram or where the rectangle was defined.
You can change the size using the arrow on the bottom right. In the right sidebar you can then edit the title/name, adjust the background color and transparency.
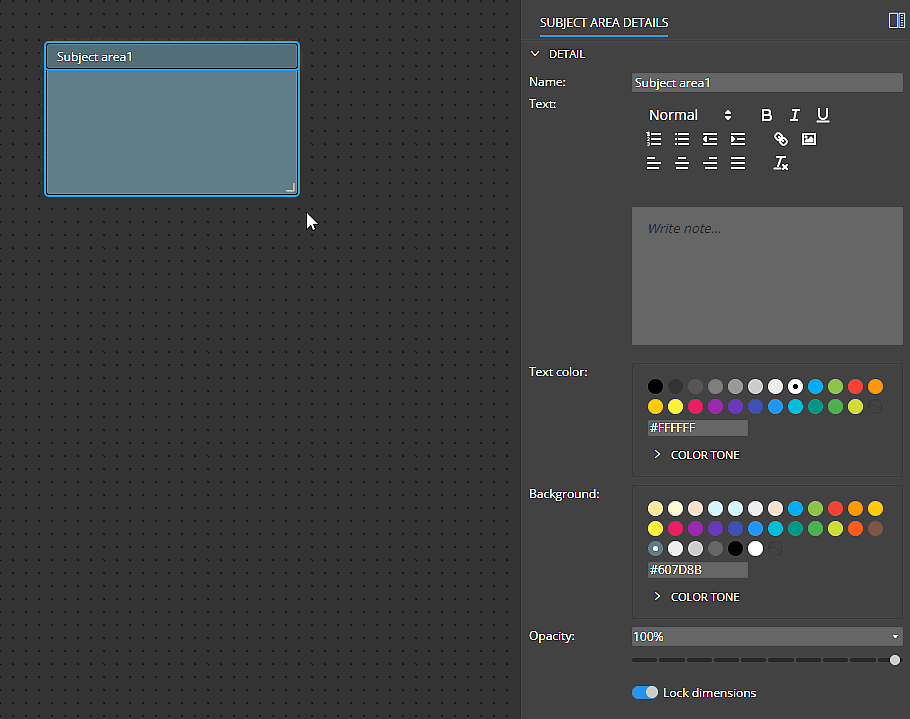
You can also write text in the subject area and format it.
Adding objects to a Subject Area
Once the object area is created in Luna Modeler, you can place database objects such as tables, functions, procedures, and additional text or notes, etc., over the subject area (consider it a layered system). The subject area is always placed at the lowest layer and does not prevent you from making mouse selections, etc.
Tips: If you want to change the subject area properties later, click on the header.
Moving a Subject Area with all included objects
To relocate the entire subject area, including the objects belonging to it, use the arrows icon in the upper left corner. Use drag and drop to change the position.

Adding selected objects to a new Subject Area
In Luna Modeler, starting with version 12, you can easily insert selected objects into a new subject area. Just right-click on one of the selected objects and select Add to new subject area from the context menu.

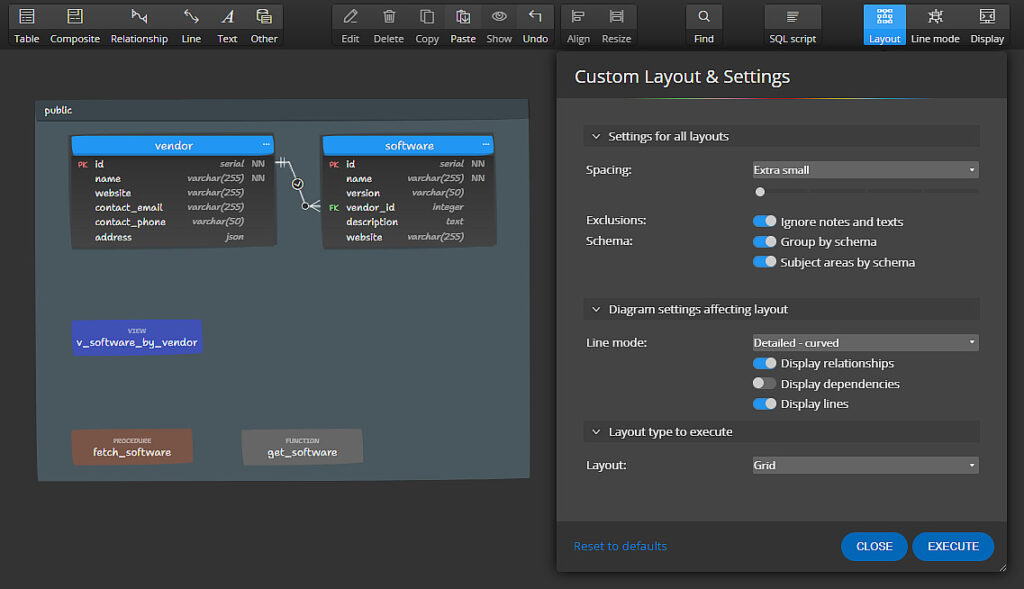
Creating Subject Areas by executing the Layout feature
Luna Modeler also allows you to create subject areas for objects belonging to the same schema. This feature is available in the Layout menu. Simply activate the Group by schema and Subject areas by schema options in Custom Layout and Settings. Luna Modeler will then create or respect subject areas that will be named the same as the schema.
#
