If you’re looking for a fully visual and simplest way to work with a MongoDB database and Docker Desktop, you’ve come to the right place!
And in this guide, we’ll walk you through everything you need to know!
- Start using MongoDB by setting it up with Docker Desktop
- Use Moon Modeler to create and manage your data model visually
- Generate validation scripts from your data models
- Run them using Visual Studio Code with the MongoDB for VSCode extension
- Make modifications and generate new validation scripts for MongoDB
Step-by-Step: How to Use Docker with MongoDB and Create Your Database Schema Visually
In the next section, we’ll guide you through the process of setting up a MongoDB database using Docker Desktop. Then, you’ll discover the joy of working with your database using fully visual tools – no terminal needed at any point.
Step 1: Download and Install Docker Desktop
First, download and install Docker Desktop on your system (Windows, macOS, or Linux).
Once you’ve installed it, go ahead and open it.
Step 2: Find the MongoDB Image and Run a Container (Using Docker Desktop GUI)
Navigate to the Images tab and click the Search field.
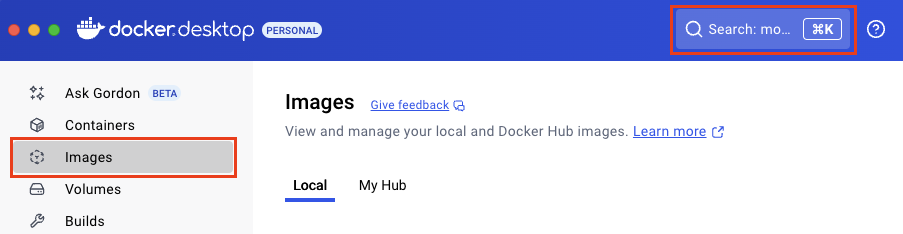
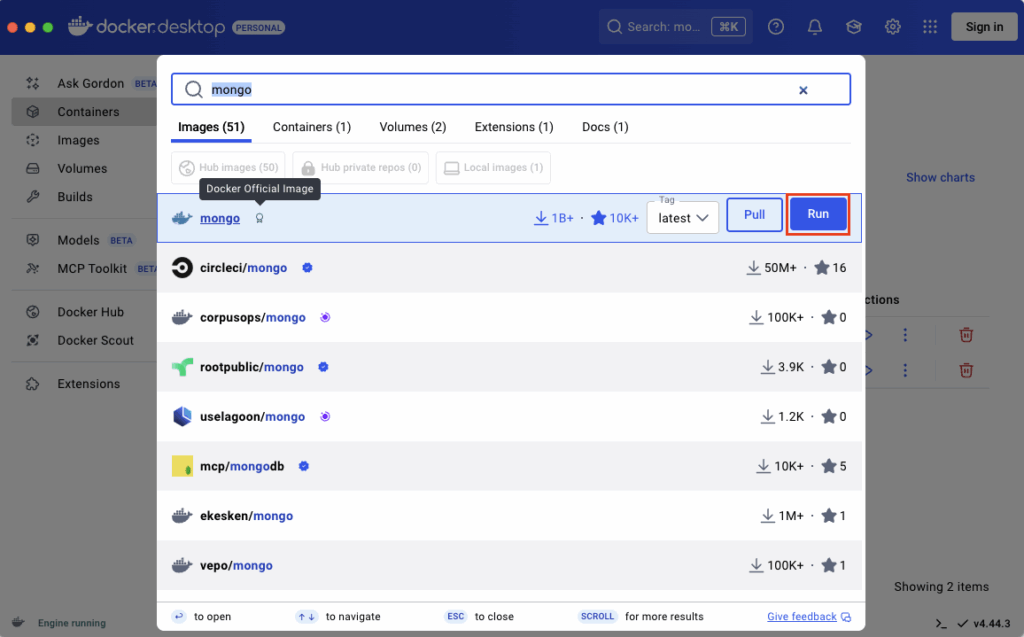
Search “mongo” and then click the Run button.
A new form opens. Define the Container name, Host port. The default for MongoDB is 27017.
Click Run to create and run the Docker container.
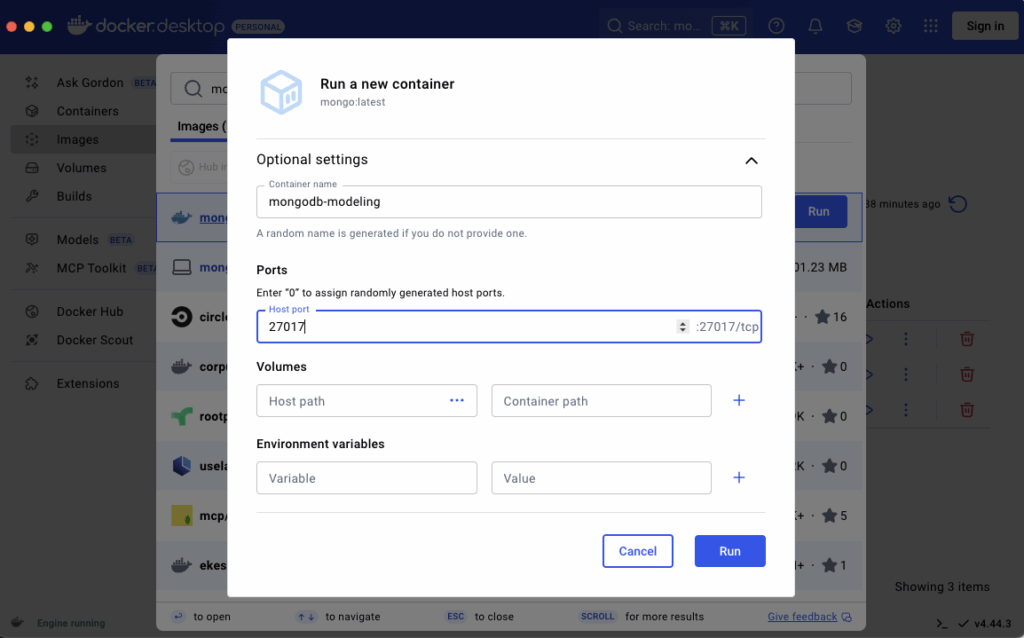
Note: MongoDB does not require a user account. Therefore, adding Environment variables for a new database user and setting up a password are optional. If you would still like to create a user and password, define the following environment variables:
MONGO_INITDB_ROOT_USERNAMEMONGO_INITDB_ROOT_PASSWORD
The running container should now be visible in the Containers section.
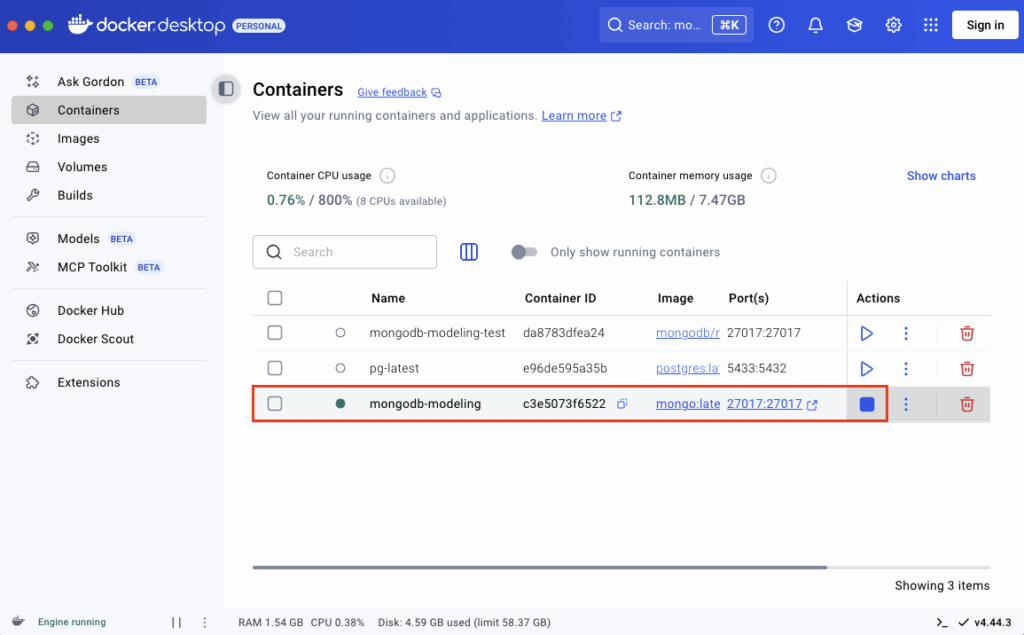
The database is now up and running. Let’s continue with creating a data model.
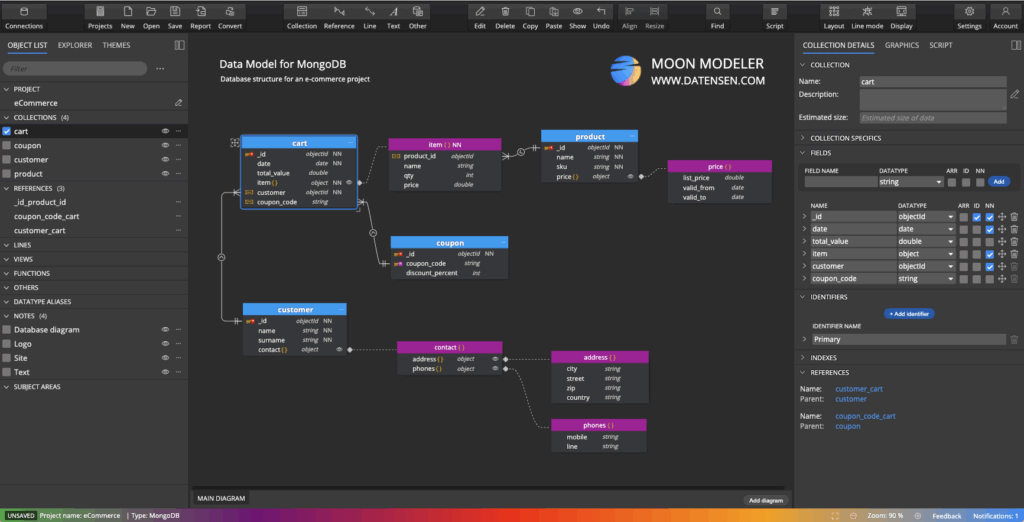
Step 3: Create a Data Model in Moon Modeler
Download and install Moon Modeler. Create a new project for MongoDB and start designing your database structure visually: add collections, define fields, references, add texts, HTML notes and subject areas and more. You can model everything without connecting to a database yet!
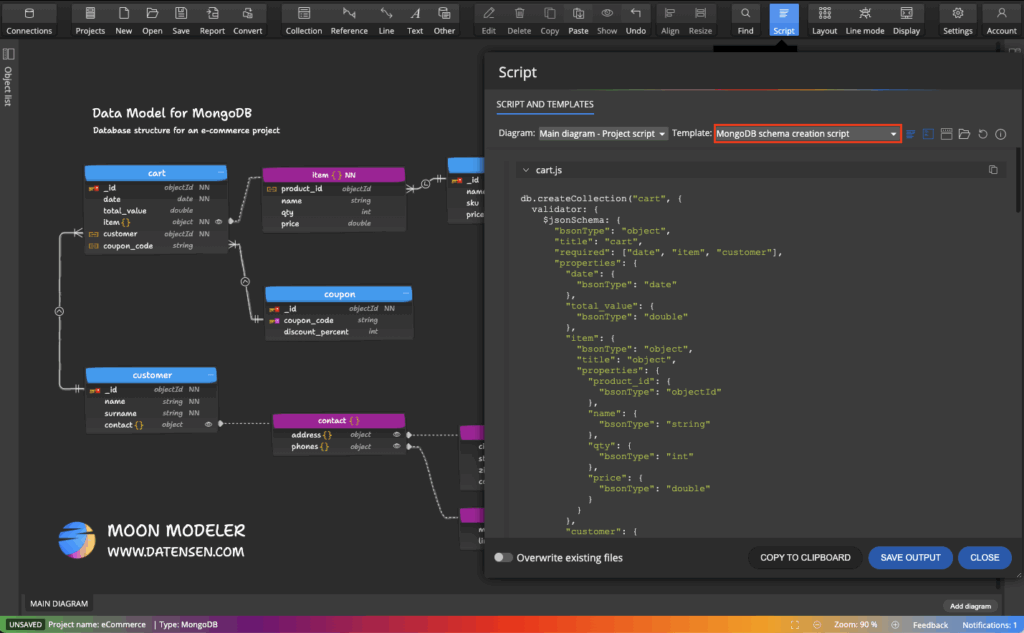
Step 4: Generate Validation Scripts from Your Data Model
Once your data model is ready: Click the Script button. Review the auto-generated scripts and save them to your computer.
Step 5: Run the Script in Visual Studio Code
Download Visual Studio Code and install it. Add the MongoDB for VSCode extension to the editor.

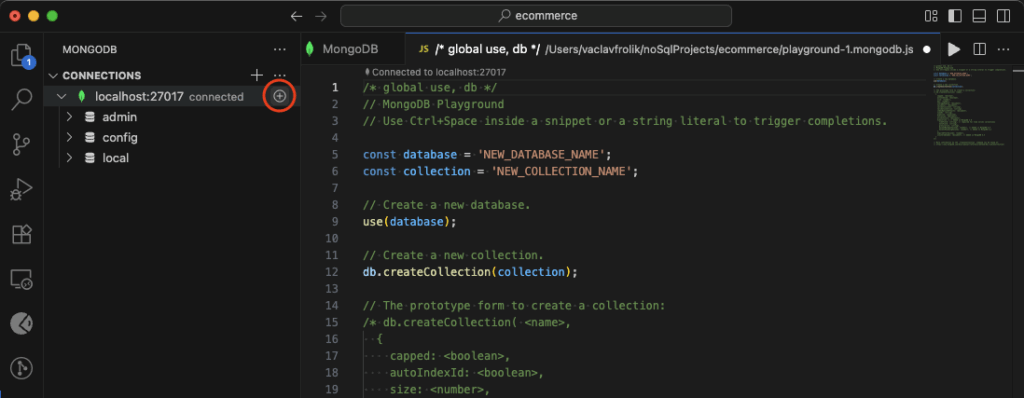
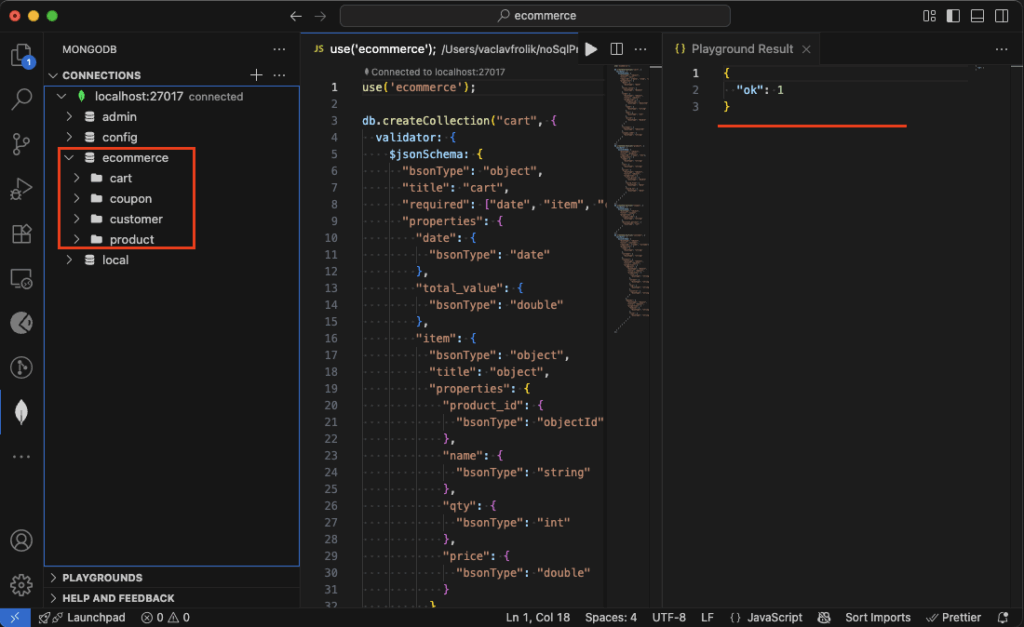
Click Connect and in type in the mongodb://localhost:27017 connection string to the input field and press enter.
Now click the Plus icon to add a new database. A new tab with a predefined script will open in VS Code.
In MongoDB, new database can be created by running the use('database_name') command. Keep this command in the editor and replace the rest of the script by the code generated by Moon Modeler. Execute it by clicking the white arrow icon in top right corner.
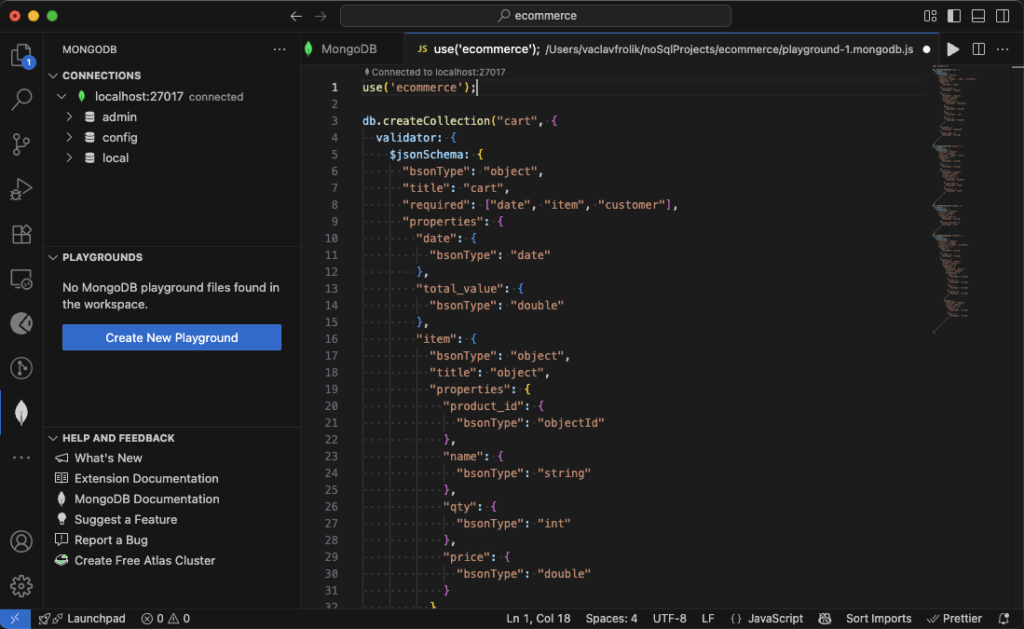
The result:
Step 6: Make Changes to Your Data Model
Changes are essential as your system evolves, especially in the early stages of development. You should go back to Moon Modeler regularly to adjust your model. Use it to: add new collections, modify fields, change data types, define references, or embed documents.
Step 7: Generate Schema Modification Scripts
In Moon Modeler, click the Script button and choose the template to MongoDB schema modification script.
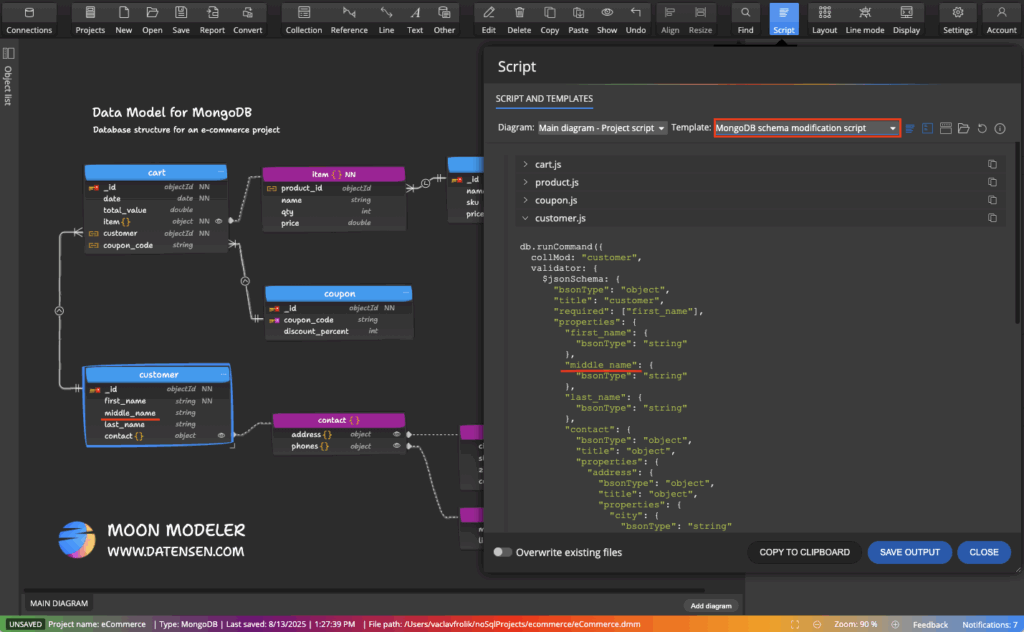
Step 8: Run the Generated Modification Script in Visual Studio Code
Start Visual Studio Code and run the script.

Key Benefits of This Visual Workflow
- No terminal or command-line required – Everything runs through intuitive GUI apps
- Work offline on your model – Design first, deploy when ready
- Reliable and repeatable script generation – Generate and run scripts only when your model is complete
Data Model – Your Architectural Plan
You might be wondering if there’s a simpler way to do this. I totally get it. Why bother with a modeling tool? Well, I’m happy to tell you that the answer is simple. It’s like building a house – you wouldn’t start laying bricks or installing windows without a complete architectural plan. The same logic applies to databases.
Data modeling is an ongoing process. You know, a lot of changes can happen as you go through the process. It’s kind of like when you’re building a house. You usually wait until the plans are all set before you start construction. It’s also a good idea to create your actual database when the model feels complete.
Get Started – Try Moon Modeler
#
